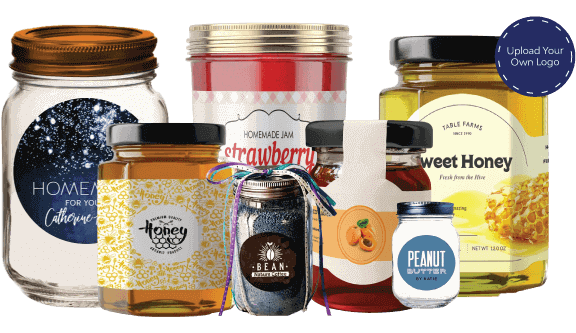
Creating mason jar chalkboard labels is a practical and creative way to organize your jars while adding a touch of personalization. Mason Jar Labels are particularly useful for labeling pantry items, craft supplies, or homemade goods. Thus, knowing how to make these labels can enhance your storage solutions and make your jars more visually appealing.
Materials Needed
1. Mason Jars
First, gather your mason jars. These jars come in various sizes, so choose the ones that fit your needs. Additionally, make sure the jars are clean and dry before applying the labels. For example, if you’re using them for food storage, ensure that they are thoroughly washed and dried to prevent any contamination.
2. Chalkboard Labels
Next, obtain chalkboard labels. These labels come in different shapes and sizes. Moreover, some are self-adhesive, making them easy to apply. Thus, choose labels that fit the dimensions of your mason jars. For instance, if your jars are tall and slim, select a long, narrow label.
3. Chalk or Chalk Markers
You will also need chalk or chalk markers for writing on the labels. Chalk markers are often preferred because they are less messy and provide a more permanent solution. In addition, they offer a cleaner and more precise application compared to regular chalk. Therefore, having the right writing tool is essential for creating neat and legible labels.
Preparing Your Labels
1. Clean the Surface
Before applying the labels, ensure the surface of the mason jar is clean. To do this, wipe the area with a damp cloth to remove any dust or grease. Afterward, let the jar dry completely. This step is important to ensure that the labels adhere properly and do not peel off easily.
2. Apply the Labels
Carefully apply the chalkboard labels to the mason jars. Firstly, peel off the backing if the labels are self-adhesive. Then, place the label on the jar, starting from one edge and smoothing it out to avoid air bubbles. Moreover, press firmly to ensure a strong bond. This will help prevent the labels from peeling off or shifting over time.
3. Write on the Labels
Once the labels are applied, use chalk or a chalk marker to write the desired text. For example, you can label your jars with contents such as “Sugar,” “Flour,” or “Pasta.” Additionally, include expiration dates or other relevant information if needed. Moreover, using chalk markers can help achieve a more polished and smudge-proof finish.
Tips for Making Effective Labels
1. Choose a Readable Font
When writing on your labels, opt for a font style that is easy to read. Firstly, avoid overly decorative fonts that can be hard to decipher. Instead, select a clear and straightforward style. Moreover, writing in a consistent size and spacing helps in maintaining readability.
2. Use Color Coding
Incorporating color coding can make your labeling system more organized. For example, use different colored markers to distinguish between various categories of items. Additionally, color coding can help in quickly identifying contents at a glance, improving efficiency.
3. Regularly Update Labels
Over time, the contents of your jars may change. Therefore, it is important to regularly update the labels. For instance, if you refill a jar with a different item, remove the old label and write a new one. This ensures that your labeling system remains accurate and useful.
Creative Ideas for Chalkboard Labels
1. Decorative Labels
If you want to add a decorative touch, consider using chalkboard labels with unique shapes or borders. For example, labels in the shape of stars or hearts can add a playful element. Moreover, you can embellish the labels with drawings or designs to make them more visually appealing.
2. Themed Labels
Creating themed labels can enhance the organization and aesthetic of your jars. For instance, if you’re organizing a kitchen, use labels that match your kitchen’s decor or color scheme. Additionally, themed labels can be useful for special occasions or seasonal events, adding a festive touch.
Maintaining Your Labels
1. Avoid Excessive Moisture
To keep your labels in good condition, avoid exposing them to excessive moisture. For example, do not submerge jars with labels in water. Instead, wipe them gently if they become dirty. This helps in preserving the appearance and functionality of the labels.
2. Store Properly
Proper storage of your mason jars and labels can also extend their lifespan. Therefore, store jars in a cool, dry place to prevent damage. Moreover, avoid placing them in direct sunlight, which can cause fading or peeling of the labels.
Conclusion
In summary, making mason jar chalkboard labels is a straightforward process that enhances organization and adds a personalized touch to your jars. By following these steps, you can create effective and attractive labels for various uses. If you’re seeking high-quality materials and additional support for your labeling needs, exploring Packaging Solutions Canada can provide valuable resources and options. Therefore, thorough planning and careful execution will help you achieve practical and visually appealing labeling for your mason jars.


